Friday, December 27, 2013

Attack on Titan GSC Colossus Titan Nendoroid Review and Video Demo

It should come as no surprise that I'm hopelessly addicted to all things Attack on Titan.  I'm not a terribly huge fan of Nendoroids, but I do own a couple.  They're very cute, but I like a larger range of poseability in my figures (like Revoltech and Figma).  However, I've had the Colossus Titan preordered since it first became available, there was absolutely NO way I was passing on this playset.  It's simultaneously one of the cutest and most disturbing figures I own!

Even the packaging was pretty cool, I love the alternate faceplate peeking over the top!

Tons of pieces with smaller Titans, buildings, Survey Corps, and civilians.
The playset comes with everything you need to recreate your own little Shiganshina District, complete with teensy buildings and a removable broken Wall Maria.  The playset also features three of the showcased smaller class titans from the earlier episodes of the anime.


There are two different faceplates for the Colossus Titan.  The 'realistic' version and a super deformed version.  I prefer the super deformed look with the articulated jaws :3.


Unfortunately, as with most Nendoroids, this figure is practically incapable of standing on its own.  I got my hopes up after seeing the beefier feet and legs, but the head is still just too hefty for them to support it.  Although this figure is heavily articulated, the range of motion is still limited by the body, meaning he can't sit properly =_=.  Normally, problems like this would drive me absolutely bonkers, but it's something I knew to be aware of before purchasing.  Honestly, this set is just so cool, it makes up for the shortcomings in poseability.  If you're a huge fan of the show, I definitely recommend giving this set a look :).  You can check out the video demo below to get a better idea of the working parts.  Thanks for reading!


Saturday, December 14, 2013

(Kawaii Machine) New Fairy Kei and Pastel Goth Inspired Bracelets: I feel the need, the need for beads!

Oh jeez, please don't leave.  I'm sorry, I wholeheartedly apologize for that title.  It was just... there.  I had to.

Oh, wait, look over there!  It's sparkly, cute, beady things!

For those of you who are still listening at this point, recently I decided that I wanted to try my hand at making custom beaded jewelry for the Kawaii Machine shop. 

In general, I tend to learn as I go.  If I hit a snag, I'll search through a tutorial (or six) to figure out the process.  I had no idea what I was doing, but I had handfuls of this multicolored sparkly stuff and knew I wanted to do something.

kawaii fairy kei watercolor beaded bracelet
Watercolor Butterfly Beaded Bracelet, $8
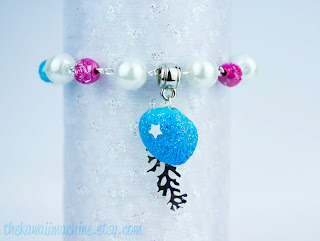
kawaii fairy kei seashell beaded bracelet
Pearl and Roses Beaded Bracelet, $8
I started out by making linked bracelets.  Each bead is hand linked with the next using silver plated beading wire.  That's a lotta clipping and wire wrapping.  Unfortunately, this also caused a pain flare-up throughout my hands and arms, so these types of bracelets will be one or two of a kind at most.  I simply won't be able to sit down and make very many of them at a time D:.

The next type I tried turned out to be much easier on my hands, and better for people who'd rather not worry about specific sizing.

kawaii fairy kei neon pearl and ribbon stretch bracelet
Pearl and Neon Stretch Bracelet, $4

kawaii fairy kei neon pearl and ribbon stretch bracelet
Paint Splatter and Pearl Key Charm Bracelet, $5
These bracelets are created by laying out a measured number of beads (usually 7-7.5" worth) in a design and threading a loop of stretch cord through.  Much, much easier on my poor hands!   I even made a few of the kind with the grosgrain ribbon for myself :3.  I did, however, have to teach my uncouth self how to tie a proper bow >_>.  Hint:  Use a fork!  For bigger bows, BAM!  Four fingers are basically a fork.

In keeping with the theme of my shop, all of the new pieces are inspired by colors and themes found in both Fairy Kei and Pastel Goth fashions.  I'm always on the lookout for new beads and ideas, so keep an eye on the shop for new items!

Friday, December 13, 2013

Tiffany Blue, Monster High Custom Rochelle Goyle Repaint

I've gone through a lot of 'favorite' colors over the years, but I have to say that 'Tiffany' blue has probably been the longest running obsession.  I've managed to incorporate it into almost all of my site graphics and logos, haha.  It's such a nice, bright color without being too overwhelming.  Rochelle is one of my favorite girls to repaint because of her hair color combination.   It's so cute, it's hard not to be inspired by this doll.  This particular girl is still available in my Etsy shop.

monster high custom repaint rochelle goyle
'Tiffany,' Custom Monster High Dance Class Rochelle Goyle Repaint

The Dance Class version of Rochelle is undoubtedly my favorite.  I love her bun hairstyle and the dance outfit she wears is just adorable (especially those shoes!).  This particular version was really fun to photograph, I tried out a lot of different ballet inspired poses with her.

monster high custom repaint rochelle goyle

I wound the strands framing her face around a few pipe cleaners with a bit of gel to give them a delicate curl, as though they'd fallen loose while practicing.  Her bangs were also trimmed and restyled. 

If I had one complaint about stock dolls, it's that bangs can turn out atrociously bad sometimes =_=;.  That and TINSEL.  Tinsel is the bane of my existence.  I still have quite a few girls waiting to be worked on, so keep your eyes peeled for new photos!

Thursday, December 12, 2013

Dimensional Magic: Monster High Gil Webber Repaint

I finally had a chance to work on some long planned custom Monster High repaints this week.  A while back, I finally found the Target exclusive Dance Class five pack with Gil.  Gil is my favorite boy to repaint, I really love his sculpting and skintone.  It's just a shame that he's so hard to get my hands on!  This time around, I wanted to try out a couple of new techniques.

Custom Repaint Monster High Gil Webber
Custom Dance Class Gillington Webber, ~Sold
 If you take a closer look at this photo, you can see that the scales above his eyes are three dimensional!  This was achieved by using a special type of gloss varnish that dries with a raised finish.  It's called Dimensional Magic, by Mod Podge.  The formula applies a bit milky at first, but it dries crystal clear with a slight magnification property which really makes details pop.  You do have to be careful about air bubbles forming, however, but they're easily picked out with a dry paintbrush or popped with a toothpick.


monster high repaint gil webber
 
I also treated all of his fins with the Dimensional Magic.  Untouched, the fins are cloudy and matte, but once the varnish was applied, it really brought out a wonderfully translucent, almost wet quality which I thought was perfect for Gil.  I really hope that some day he'll have a more widely available release, but for now I guess I'll just have to stick to getting lucky!